
Uncategorized
Step by Step Guide to Clean an Acoustic Guitar
When you view your acoustic guitar as an investment you want to properly care for it. I know I do. And I’m not talking about simply wiping it down with a cloth. I’m talking about a proper, deep clean that would make your mama proud.
Here I’m going to walk through not only the best practices for cleaning an acoustic guitar, but I’m also going to share with you the best products to use and, more importantly, which products not to use.
Caring for Your Guitar | The Basics
Before we dive into the proper cleaning methods I think it’s important to first lay the foundation for proper guitar care. If you follow these simple rules, cleaning your guitar will be an enjoyable experience.
Step 1: Cleaning the Fretboard
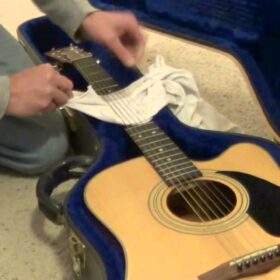
When it comes time to deep clean my guitar I usually set aside about an hour for the process. The first thing you’ll want to do is remove all of your strings. I’ve heard some people express concern over this being a strain on the guitar neck, which is used to supporting over 200lbs worth of tension, but most guitar manufacturers agree that it won’t damage your guitar to take off all the strings at once.
Steel Wool & Conditioner:
the easiest way to get rid of most of the gunk buildup on your fretboard is to get some good guitar conditioner and 0000 super-fine steel wool (the package I linked to here is less than $5 and should last you for a really long while). It’s important that you only use super-fine steel wool as anything other than this can scratch and damage your fretboard.
Fretboard conditioner isn’t absolutely necessary (you can just use the steel wool by itself) but it helps the process along. Not only that, but the conditioner also helps to hydrate the natural wood to keep it from cracking. I use Hydrate by Planet Waves for this process and it works well. Dunlop makes fretboard polish that I’ve used before and works just as well.
Old Toothbrush:
believe it or not, there is a good use for your old toothbrush! I usually reapply some fretboard conditioner and buff it in using the old toothbrush. Unlike steel wool, you can apply as little or as much pressure as you want using a toothbrush without fear of damaging the fretboard, which is nice.
When you’re finished make sure to wipe down the fretboard with a paper towel or a guitar cloth, removing any excess conditioner. The result should be a beautiful, deep-colored wood with shiny silver frets that will make you smile!
Step 2: Cleaning the Bridge
After you finish the fretboard you can move onto the bridge, which is cleaned similar to the fretboard. Remove the saddle and nuts, using the conditioner and toothbrush from above to give the bridge a good scrub. I also take this time to clean the dirt that has accumulated all around where the bridge is glued to the soundboard of the guitar.
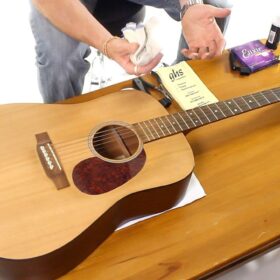
Step 3: Cleaning the Finish
What NOT to Use
Which Guitar Polish to Use?
The truth is that water works just fine to help polish your guitar. You don’t have to get all fancy with store-bought polishes if you don’t want to. Just lightly wet your guitar cloth and add a little elbow grease.
That said, I still do use a wax polish and you’re likely going to want to as well. While there are plenty of guitar-specific polishes on the market, most professional guitarists (and even guitar manufacturers) recommend something as simple as automotive wax. I know it sounds crazy but if you don’t believe me, perhaps you’ll believe it when high-end maker Taylor Guitars tells its guitarists to use Turtle Wax Express Shine on its guitars. The reason it’s so popular is that it works well on both glossy and satin finishes.
Step 4: Final Touches
Before I restring the guitar there are just a couple little things that I personally like to do. You won’t find these in any other cleaning guide but I think it’s important!
First of all, while I have my soundhole wide open, I like to clean the inside of the guitar which accumulates dust and cobwebs. Don’t use water to do this (the wood inside is unfinished and water will damage it). I usually take a paper towel to grab the dust bunnies that have inevitably collected along the edges.
Second, I like to make sure that my battery is changed (I have an acoustic-electric) and I check to make sure that the nut on the quarter-inch plug is tight. This requires me to stick almost my entire arm into the soundhole, something that is absolutely impossible if there are any strings on the guitar.